Operation Summary
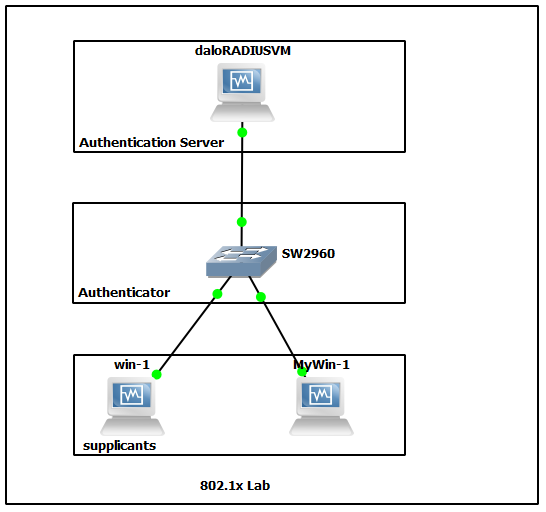
Today I tested 802.1x lab with cisco 2960 switch as Authenticator, DaloRadius as Authentication Server and Two window 7 clients as supplicant. Although EAP support different kind of authentication mechanisms, I use simple username and password authentication for lab.
Server Config
Radius Installtion
1
2
3
| $ yum -y install freeradius freeradius-utils freeradius-mysql #installtion of free radius.
$ systemctl enable radiusd --now #mask radius service enable on boot and start the service.
$ systemctl enable firewalld --now #mask firewall service enable on boot and start the service.
|
Firewall Configuration
1
2
3
| $ firewall-cmd --add-service=radius --permanent #firewall rule for radius service port.
$ firewall-cmd --reload #reload the firewall rules.
$ firewall-cmd --list-services --zone=public #check radius service port allowed or not.
|
Radius Configuration
1
| $ vim /etc/raddb/clients.conf
|
1
2
3
4
| client 192.168.0.0/24 {
secret = cisco
shortname = switch
}
|
1
2
3
4
5
|
kpps Cleartext-Password := "Secret"
Reply-Message = "Hello, %u"
test Cleartext-Password := "Test"
Reply-Message = "Hello, %u"
|
1
| $ systemctl restart radius
|
If you want to see the processes more details please run radius service with debug mode.
1
2
| $ systemctl stop radiusd
$ radiusd -X
|
Switch Configuration
Establish connection betweeen server and switch
1
2
3
4
5
6
7
8
9
| switch(config)#interface vlan2
switch(config-if)#ip address 192.168.88.31 255.255.255.0
switch(config-if)#no shutdown
switch(config-if)#interface GigabitEthernet1/0/1
switch(config-if)#switchport mode access
switch(config-if)#interface GigabitEthernet1/0/2
switch(config-if)#switchport mode access
switch(config-if)#interface GigabitEthernet1/0/3
switch(config-if)#switchport mode access
|
AAA configuration
1
2
| switch(config)#aaa new-model
switch(config)# radius-server host 192.168.88.137 auth-port 1812 acct-port 1813 key cisco
|
802.1x authentication and accounting configuration
1
2
3
4
5
6
7
8
9
| switch(config)# aaa authentication dot1x default group radius
switch(config)#aaa accounting dot1x default start-stop group radius
switch(config)#interface GigabitEthernet1/0/2
switch(config)#authentication port-control auto
switch(config)#dot1x pae authenticator
switch(config)#interface GigabitEthernet1/0/3
switch(config)#authentication port-control auto
switch(config)#dot1x pae authenticator
switch(config)#do wr
|
Testing
Configure static ip address for two window clients. Configure 802.1x client authentication 1) Run > services.msc > Wired AutoConfig, right click and start the service. 2) Control Panel > Network and Sharing Center > Change adapter settings > Interface Properties > Authentication 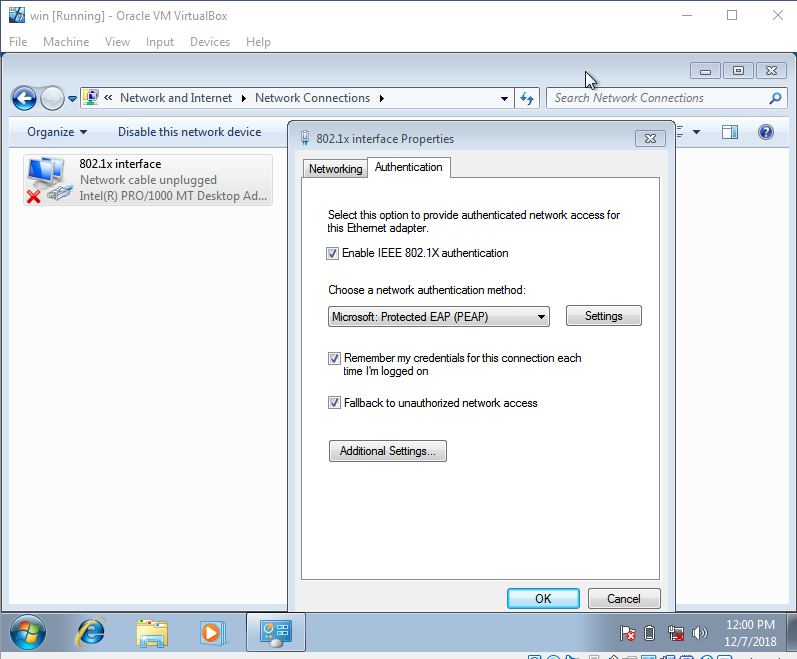
1
2
3
4
5
| 3) Choose a network authentication method: Settings configuration was as follow 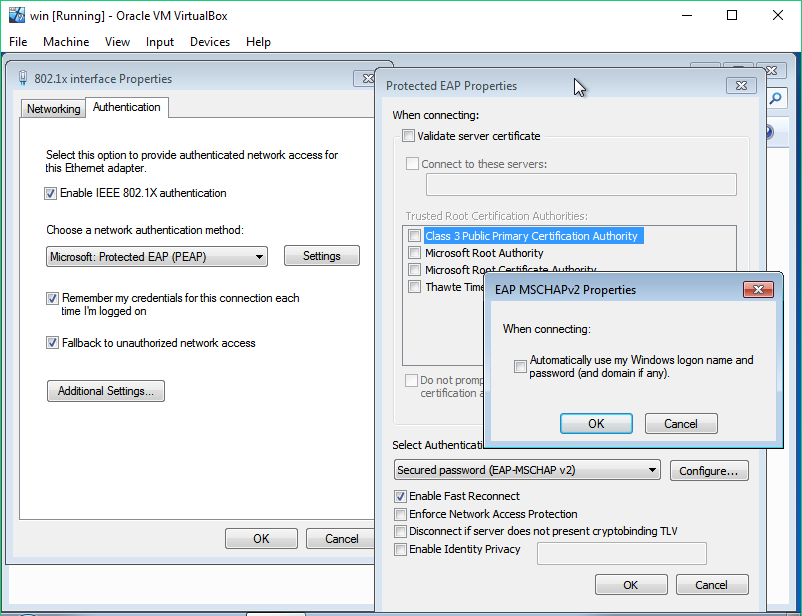{: .shadow width="1548" height="864" style="max-width: 90%" }
4) Additional Settings was as follow was as follow 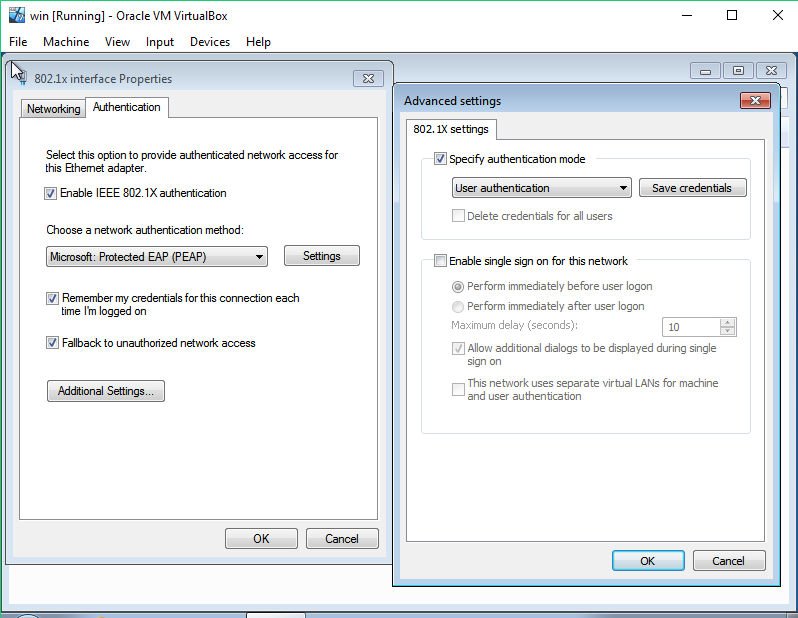{: .shadow width="1548" height="864" style="max-width: 90%" }
5) And set username and password that were configured in radius users config file under “Save credentials”
|
Result
I transfer file between two client and got the result as follow. 