IPv6 Tunnel Broker over IPv4
Today, I gonna to set up ipv6 reachability to my public server. Although It’s fine to set up IPv6 address in large ISP, it is difficult to establish ipv6 reachability in small ISP. I hope this will help to fulfill ipv6 requirements for some software deployments. And this is how I found out luckily.
Task list
- Creating the tunnel
- Configuration
- server to LAN
- server to HE
- Verification
- DNS IPv6 record
Creating the tunnel
First thing, I need to register here www.tunnelbroker.net. They ask for some basic contact information Full name, street address, phone and email address. After that, they will be sent initial password to confirm your email address. Log in to the website and change your own password something more secure. To create the tunnel, please visit here tunnelbroker.net. Enter the public ipv4 address of your server and select the tunnel endpoint from bgp.he.net side with the lowest latency to the server.
Geographic distance is a good standard-in for network latency in general.
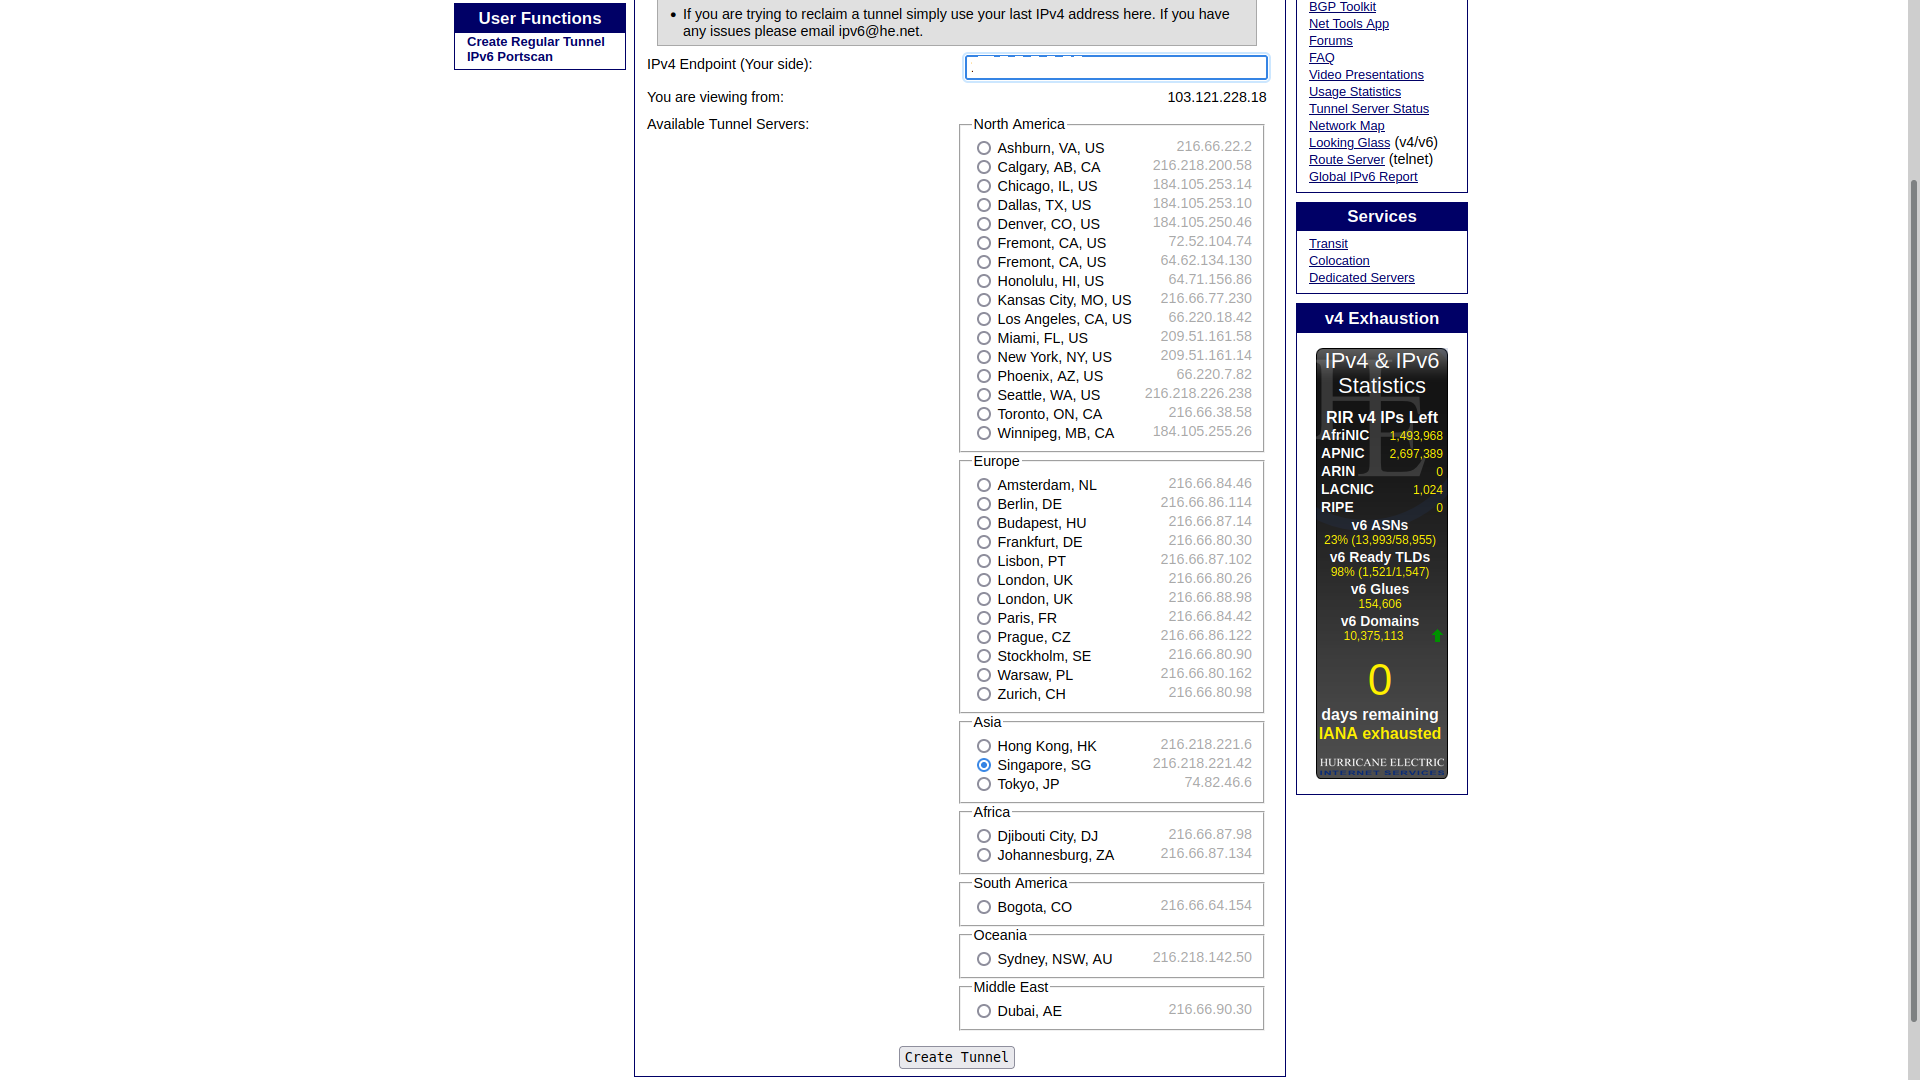
It will bring you to the tunnel details page when click the “create tunnel” button.
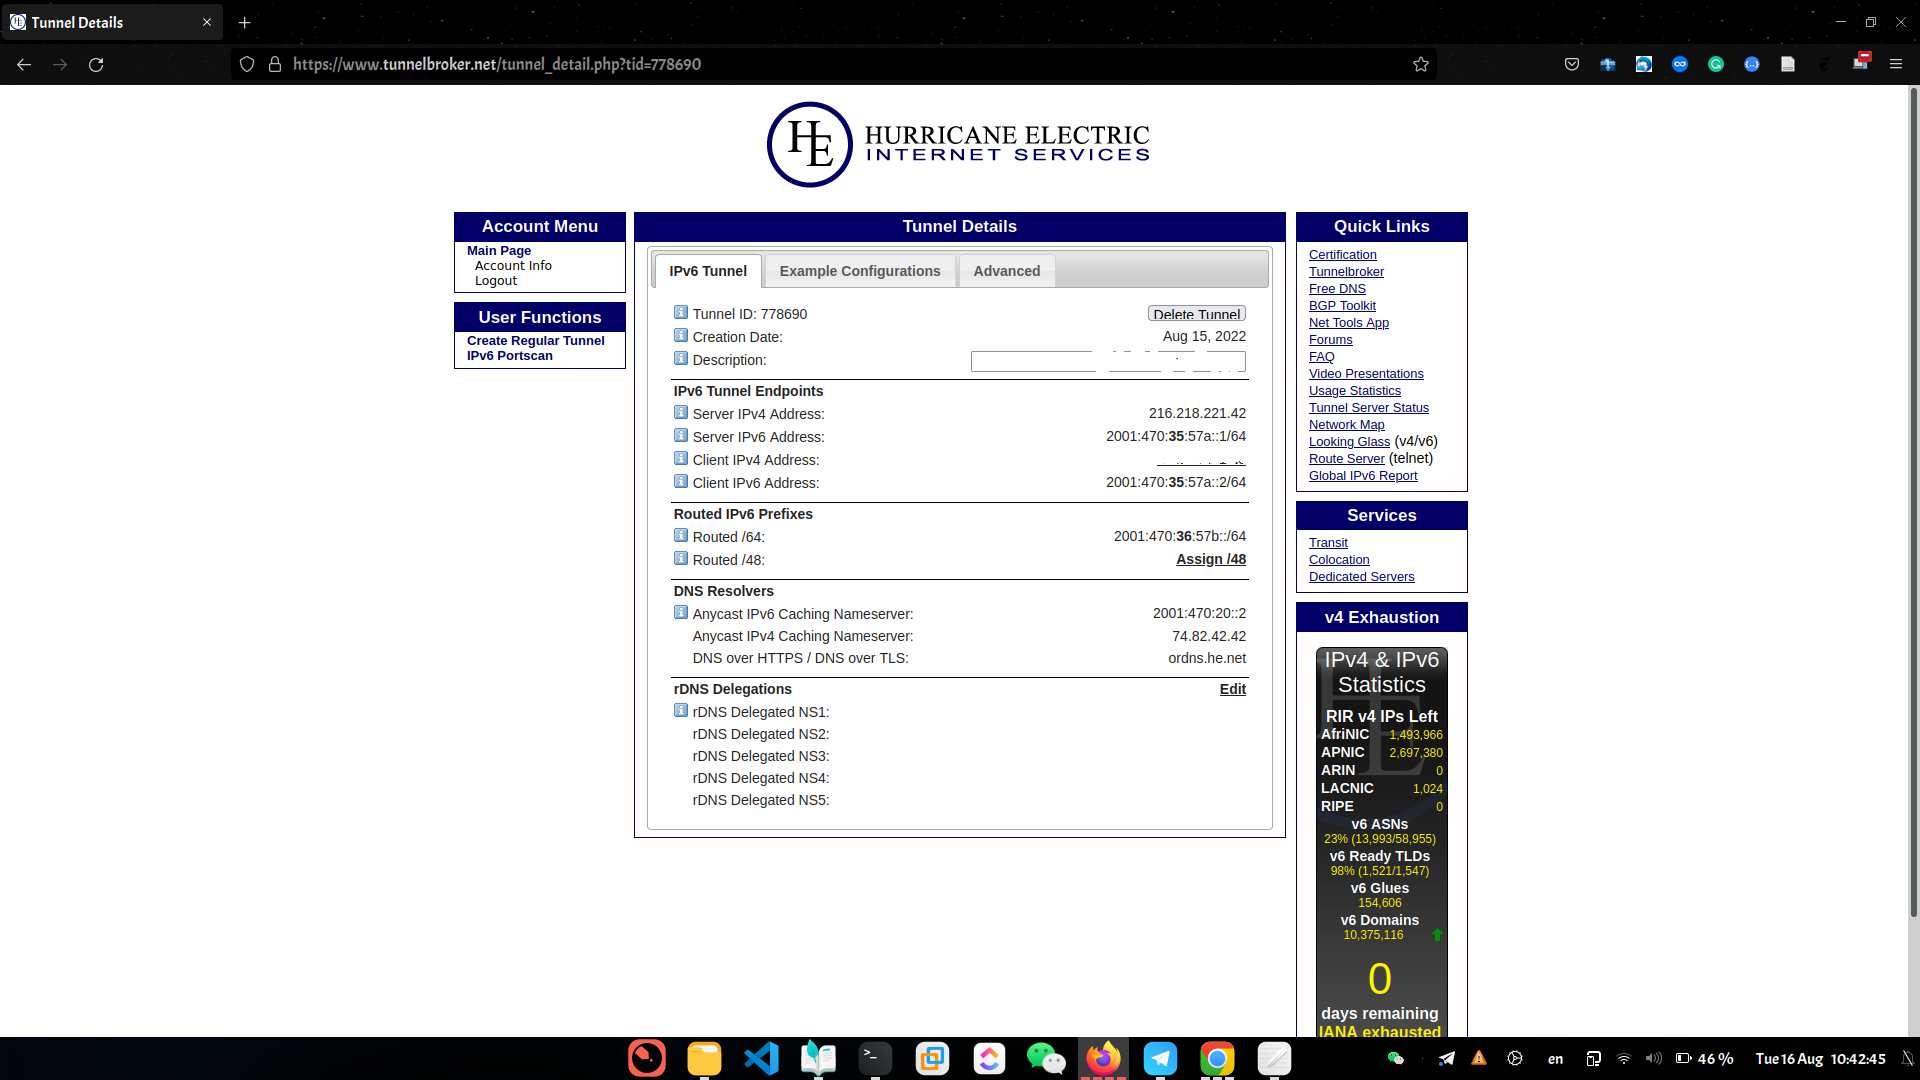
My understanding in a table is as follows.
| IPv6 Tunnel Endpoints Info | |
|---|---|
| Server IPv4 Address | tunnel side IPv4 address from HE side endpoint router |
| Server IPv6 Address | tunnel side ipv6 address from HE side endpoint router |
| Client IPv4 Address | IPv4 address from local server |
| Client IPv6 Address | tunnel side IPv6 address for local server |
| Routed IPv6 Prefixes | |
|---|---|
| Routed /64 | IPv6 space to assign our local network. Future IPv6 routing for local server |
Server will serve as IPv6 Gateway in local network and send IPv6 packets wrapping along with IPv4 packets over tunnel through Server IPv4 Address destination. Routed /64 are routed back to HE’s network in the region you requested. Then HE’s router encapsulates in IPv4 and tunnels back to local server’s IPv4 address. Server is responsible for decapsulation and routed back to local network. Server here acts as border router which is member of two different IPv6 network.
This is the requirements that I need to be keen on for this lab:
- Server IPv4 Address in lab is ‘216.218.221.42’
- Server IPv6 Address in lab is ‘2001:470.35.57a::1/64’
- Client IPv4 Address in lab is ‘server’s public IPv4 address’
- Client IPv6 Address in lab is ‘2001:470:35.57a::2/54’
- Routed /64 IPv6 space is ‘2001:470:36:57b::/64’, I chose IPv6 Address ‘2001:470:36:57b::1/64’ for server. Can simply assign address between ‘2001:470:36:57b::’ and ‘2001:470:36:57b:ffff:ffff:ffff:ffff’.
Configuration
server to LAN
Network interface configuration may be vary based on Operation System. This lab used centos so I can configure over terminal user interface for NetworkManager or network interface configuration file. I choose the second.
I put below to ‘/etc/sysconfig/network-scripts/ifcfg-ens192’.
1
2
3
4
5
6
7
IPV6INIT=yes
IPV6_AUTOCONF=no
IPV6ADDR=2001:470:36:57b::1/64
IPV6_DEFROUTE=yes
IPV6_FAILURE_FATAL=no
IPV6_ADDR_GEN_MODE=stable-privacy
IPV6_DNS_PRIORITY=100
server to HE
Don’t need to worry about it. HE provides example configuration based on devices. Choose the device type and can get the required config as follow.
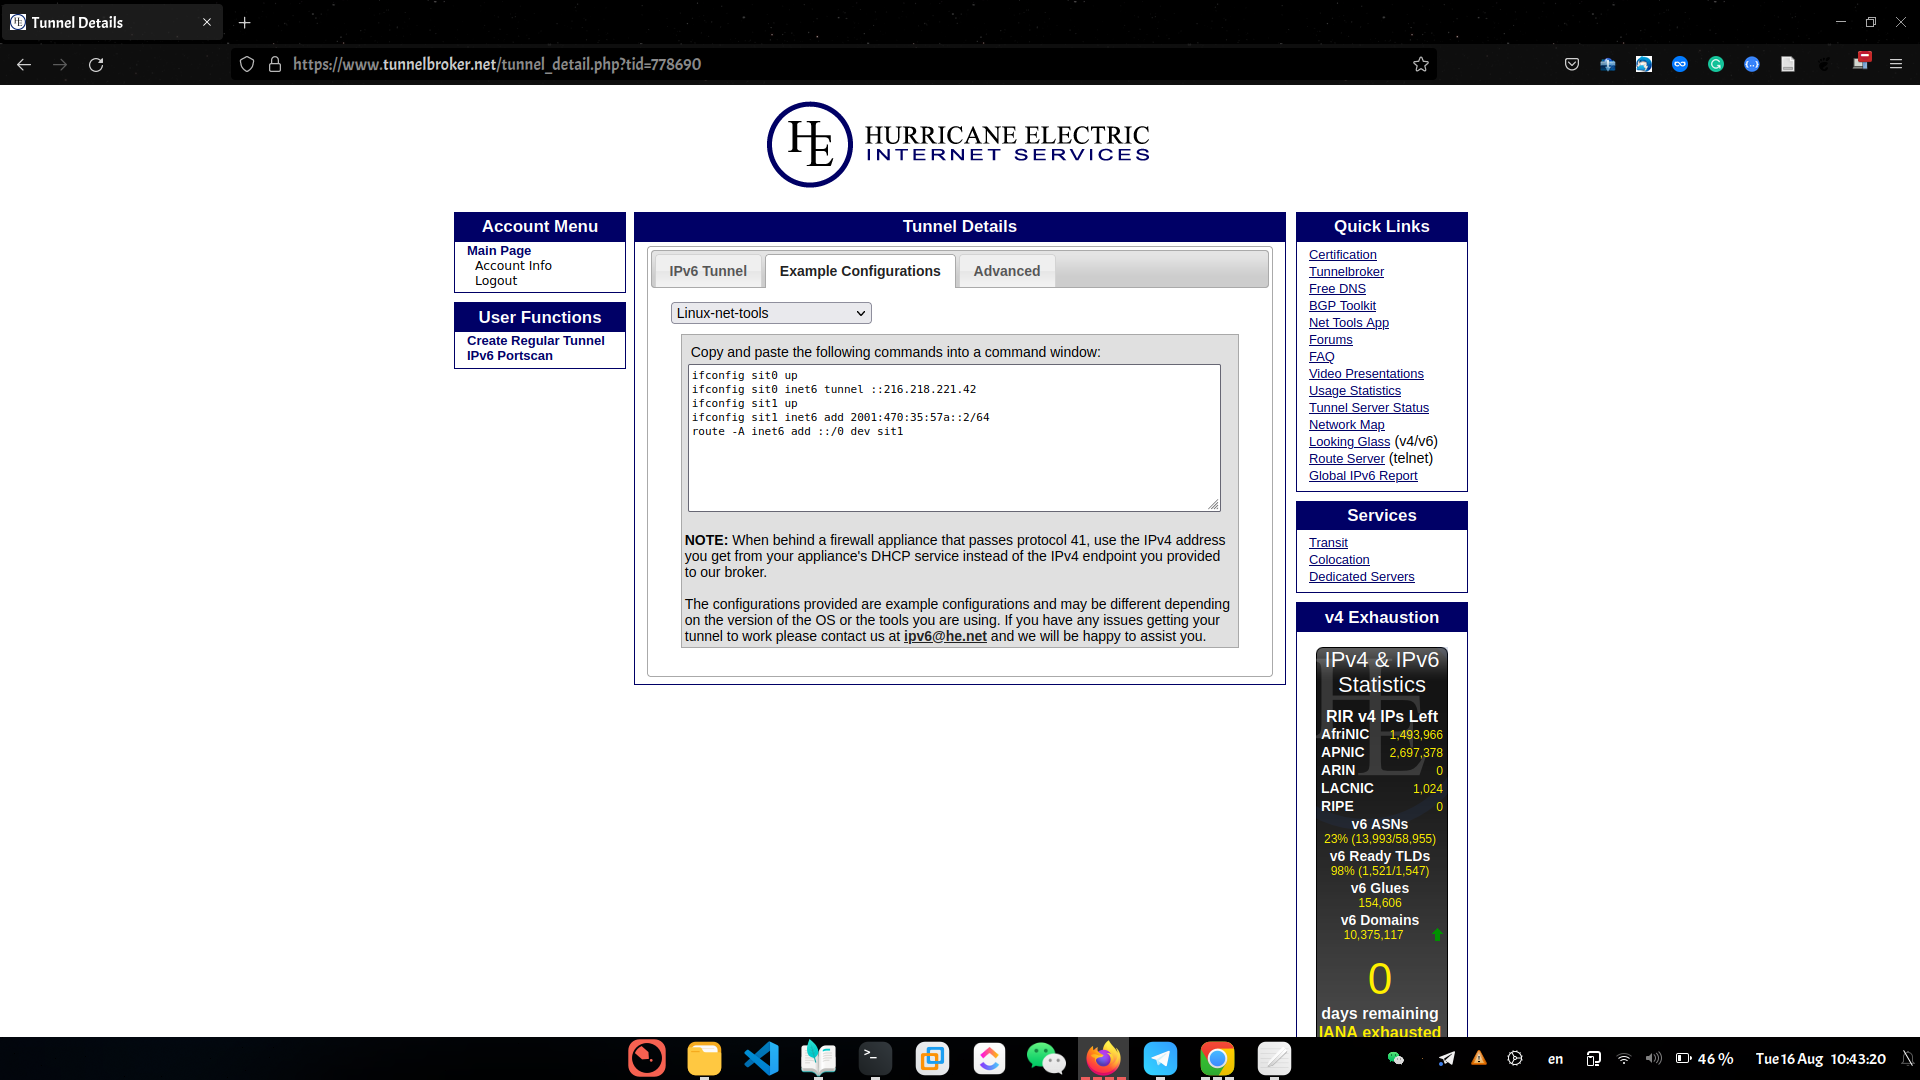
or
can simply put below code to ‘/var/run/NetworkManager/system-connections/he-ipv6.nmconnection’
1
2
3
4
5
6
7
8
9
10
11
12
13
14
15
16
17
18
19
20
21
22
23
24
25
26
[connection]
id=he-ipv6
uuid=72bc5e25-0131-4ea0-838a-d5e01c68f870
type=ip-tunnel
autoconnect=false
interface-name=he-ipv6
permissions=
timestamp=1660642073

[ip-tunnel]
local='server public IPv4 address'
mode=3
remote=216.218.221.42
ttl=255

[ipv4]
dns-search=
method=disabled

[ipv6]
addr-gen-mode=stable-privacy
address1=2001:470:35:57a::2/64
dns-priority=100
dns-search=
method=manual
Verification
1
ping6 google.com
or can use this ipv6now.com.au.
DNS IPv6 record
If DNS on Bind, can include this to ‘/etc/bind/named.conf’ and add IPv6 record.
1
2
3
4
5
6
7
8
9
10
11
12
13
14
15
$TTL    604800
@   IN  SOA ns1.example.com dns-admin.example.com. (
                  5     ; Serial
             604800     ; Refresh
              86400     ; Retry
            2419200     ; Expire
             604800 )   ; Negative Cache TTL
;
             IN  NS  ns1.example.com.
             IN  NS  ns2.example.com.

ns1          IN  A     aaa.bbb.ccc.ddd
                 AAAA  2001:470:36:57b::1 ; here
www          IN  CNAME my-server
my-server    IN  AAAA  2001:470:36:57b::1 ; here
Please don’t forget to reload the service to update the record.
1
sudo rndc reload example.com && sudo rndc notify example.com
If you want to add reverse zone file ‘0.6.3.0.0.0.7.4.0.1.0.0.2.ip6.arpa’.
1
2
3
4
5
6
7
8
9
10
11
$TTL    604800
@   IN  SOA example.com. dns-admin.example.com. (
                  5     ; Serial
             604800     ; Refresh
              86400     ; Retry
            2419200     ; Expire
             604800 )   ; Negative Cache TTL
@origin 0.6.3.0.0.0.7.4.0.1.0.0.2.ip6.arpa
        IN  NS  ns1.example.com.

1.0.0.0.0.0.0.0.0.0.0.0.0.0.0.0.a.7.5	IN	PTR	my-server.example.com.
Production Update!
The tunnel servers are a shared resource and latency or throughput cannot be guaranteed. Running a testing server through the tunnel is likely to be constrained with contention for resources, which can affect your latency and throughput results.
one month production is still ok in this case ==> Honkong to Yangon and Singapore to Mandalay.
Thank You!